An ND filter reduces the amount of light coming through your camera lens without affecting the colors of the scene. They come in different strengths (+1, +2, +5 Neutral Density stops) and can be stacked on top of each other to reduce the light further.
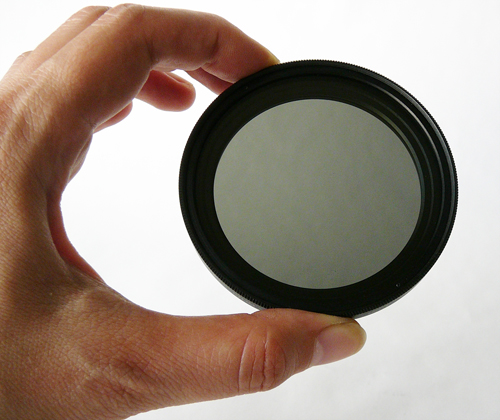
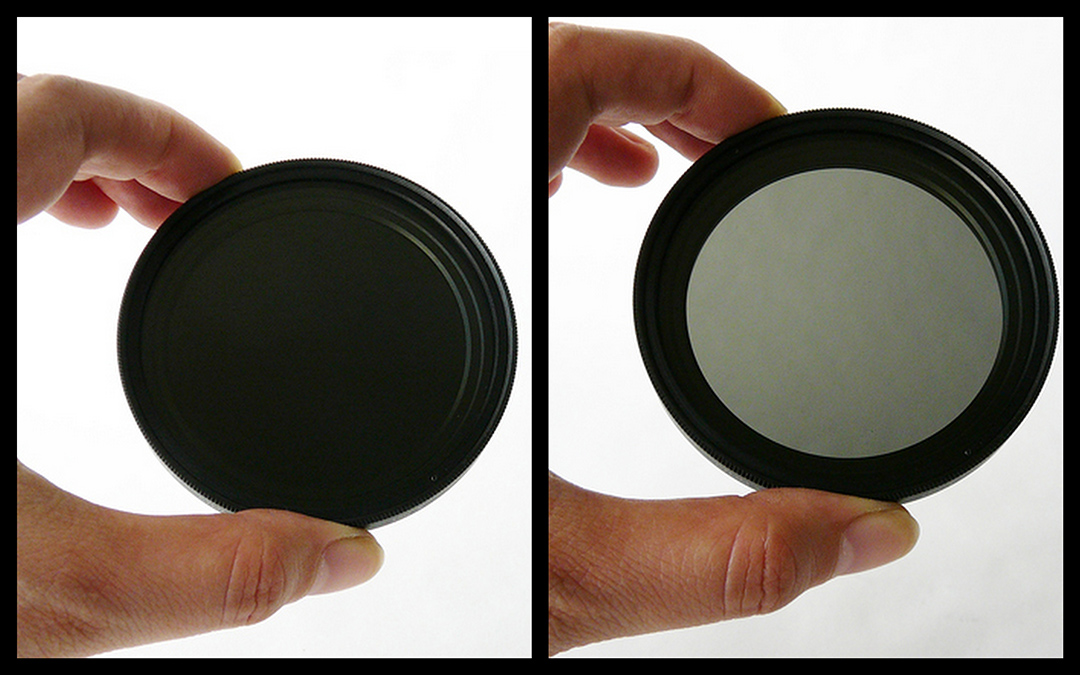
A variable ND filter, set to a relatively light setting.
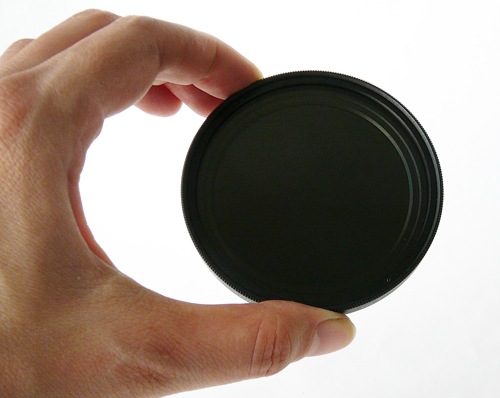
A variable ND filter rotated to its darkest setting.
These filters are really handy to have in your camera bag when you need/want to use slower shutter speeds. When it’s a bright day, it can be difficult, or impossible, to get a slow enough shutter speed, even after reducing your aperture and ISO, and still get the look you want.
The aperture can’t be closed down far enough to use a shutter speed of 1 second or longer. When you hear somebody say “closed down,” what they are referring to is making the aperture smaller and the f/stop number larger. For example, if the aperture on the camera is set to f/11 and I tell you to stop the lens down 1 stop, you would then set the aperture to f/16, which is a smaller aperture and is half as much light as f/11. On the flip side if I tell you to “open up” the lens 1 stop, you would then go from f/11 to f/8 which is now letting in twice as much light.
Below are some examples of Niagara Falls. The first image is without a Neutral Density filter. It’s a bright day and the falls are in the sun. If you’re looking to freeze the action of the water over the falls, that’s fine – fast shutter speed does the trick. But if you want to soften the water, blurring it into something that’s silky smooth, it’s just too bright. Pull out the ND filter and attach it to the front of your lens. I used a variable ND filter which gets stronger then fainter as you rotate it once attached. Now I can use a shutter speed of 0.5 seconds.
You will want to make sure you have your camera mounted on a tripod when using shutter speeds slower than than 1/30 of a second so that you do not have any blur from hand holding the camera.
My #1 use is to slow water flow into something smooth, but it’s certainly worth experimenting on other subjects.
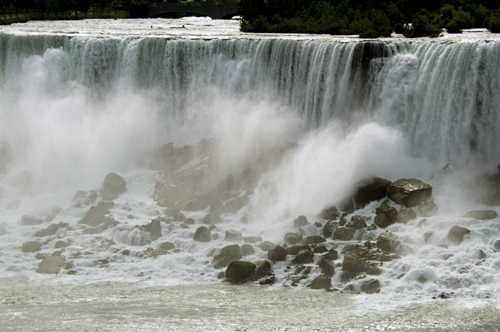
Niagara Falls without ND filter: shutter priority, spot metering, 1/1000 sec, f/8, ISO 100, -0.7 EV
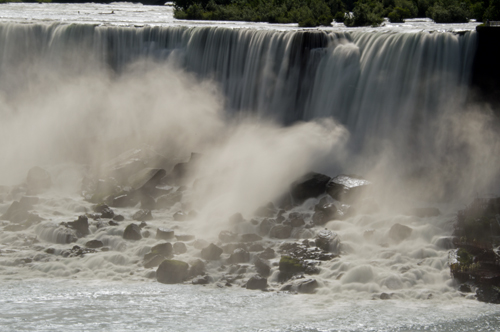
Niagara Falls with ND filter: shutter priority, center-weighted average metering, 1/2 sec, f/36, ISO 100, -0.3 EV
Glass is Better than Plastic
Plastic or resin filters can scratch. Avoid these filters and buy ones made of glass, instead. Tiffen and Schneider are made of glass. B+W, Cokin, and Hoya are all plastic. You may want to give one of the less expensive brands a try to see if they come in handy but it’s worth the money to buy filters made of glass for long-term use.
[easyazon_infoblock cart=”n” identifier=”B004Z55VP0″ locale=”US” nw=”y” tag=”healfiss-20″] [easyazon_infoblock cart=”n” identifier=”B00004ZCI2″ locale=”US” nw=”y” tag=”healfiss-20″]
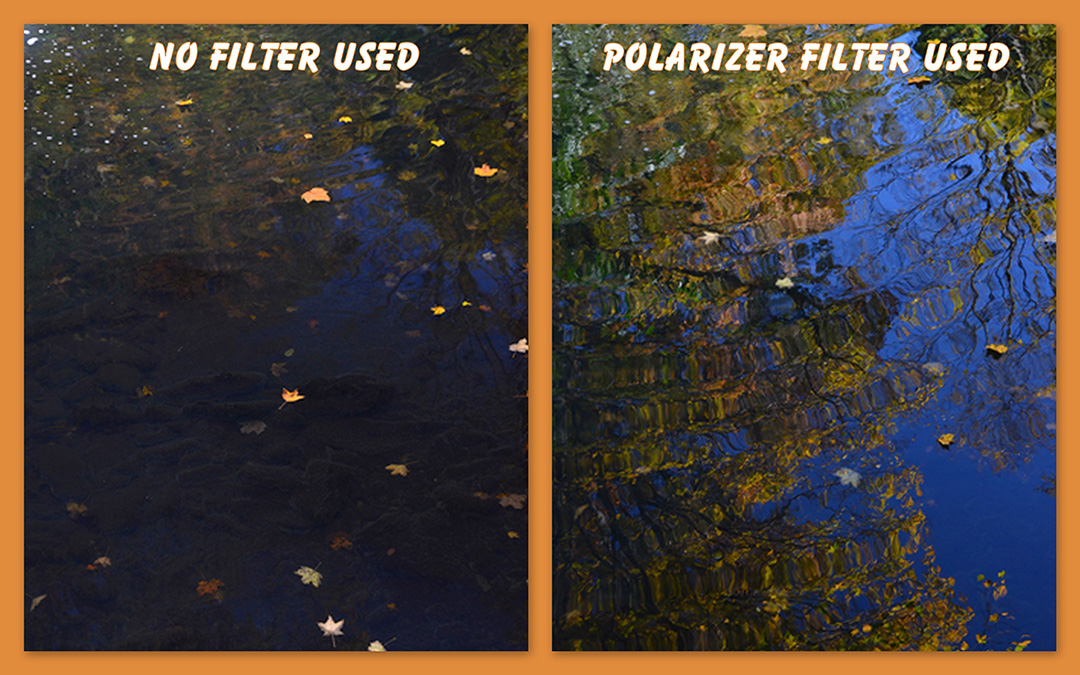
A second use for ND filters is to even out the exposure in a scene that has a bright sky and a dark foreground. Unfortunately, a camera cannot capture the entire range of light values in a scene with just one exposure. That is when you’ll want to use a Graduated ND filter.
The Graduated ND filters go from dark to clear and therefore only affect a portion of the image. These help to reduce wide contrasts in the scene such as evening out the exposure between the foreground and the sky as in the example below.
Shot without using a Graduated ND Filter
Shot with a Graduated ND Filter
The kit below is the one used to take the two pictures above. It is inexpensive and will get the job done on a budget. One of the downsides to this kit is that the top area of the image starts to get a pinkish color cast the higher you go in numbers with the ND filters. For the price, though, you cannot beat it.
[easyazon_image align=”center” height=”500″ identifier=”B019RT2GRY” locale=”US” nw=”y” src=”http://melodic-wind.flywheelsites.com/wp-content/uploads/51UUtlbdOsL.jpg” tag=”healfiss-20″ width=”500″]
A third use for an ND filter is if you want to shoot with lower f/stops in bright light. Let’s suppose that you want to shoot your 50mm f/1.8 lens wide open at f/1.8 on a bright sunny day. Even if you set your ISO low to 100, you may still have too much light coming into the camera and you will not have a shutter speed fast enough to get correct exposure for the shot. By using an ND filter you can block enough light in order to use the lower aperture and not overexpose the shot.
If you want to try this yourself use any lens that you have. Set your camera to the A or Av (Aperture Priority) position on the Mode Dial and the ISO to 100. Now, set your aperture to the lowest number you can (this opens up the lens to its maximum). Go outside during the day and take a picture of something. Odds are that the shutter speed setting will be very fast and may even be blinking. If this is the case, the shutter speed cannot go any faster and the picture will be overexposed or too bright. To fix this problem, attach an ND filter to block some of that light. You will know that you have the correct ND filter attached once the shutter speed setting stops blinking in the viewfinder.
How to Use
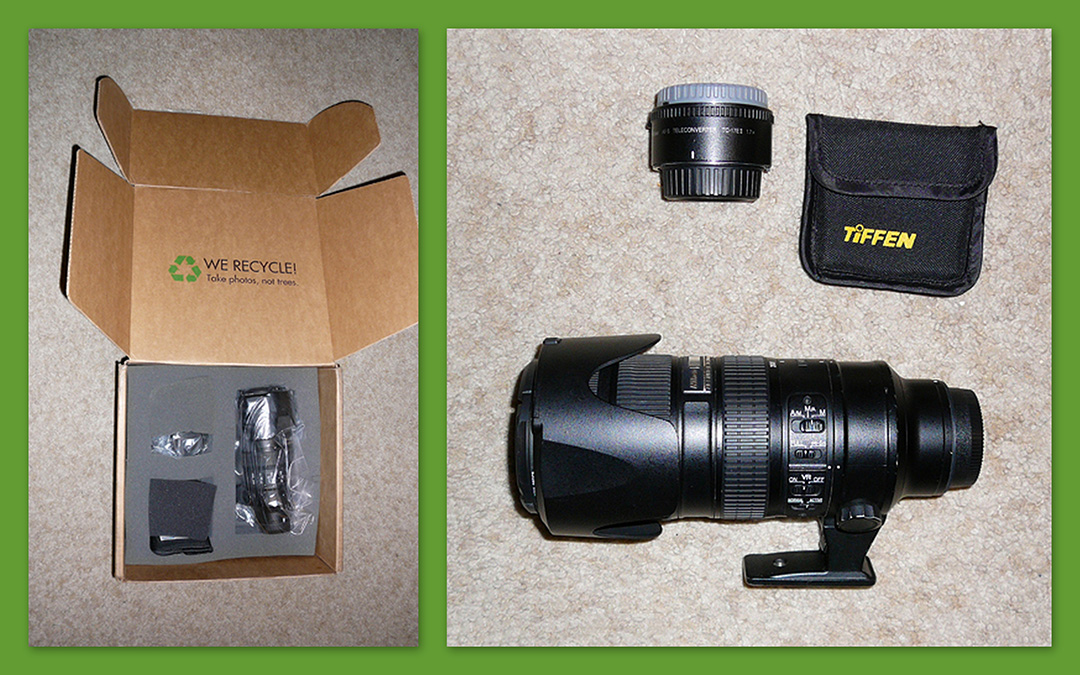
You’ll need to know the filter size of your lens(es): look on the inside of your lens cap or on the lens itself. There will be a symbol before the number that looks like a 0 (zero) with a slash through it. You can either buy multiple filters in different sizes (one for each lens) or buy the largest filter you need and use step-up rings to use with your smaller lenses.
I like the filters that screw into the front of the lens. There are other filters that are square or rectangular and require a holder (either you or a piece that screws into the front of the lens and you slide the filter into the holder). When using a holder, the filter should be very close to the lens. If it’s not, light can be reflected between the lens and the filter, ruining your image instead of improving it.
When purchasing a graduated filter, I recommend using ones with a soft edge, rather than a hard edge. The change from clear to dark is more gradual and less likely to distract the viewer if it’s not set in the perfect spot.
I hope this gives you some ideas on how and when to use an ND filter in your photography. ND filters allow us to be creative and also fix exposure problems that we encounter.
You will find that a good tripod and set of ND filters are essential to taking great landscape photos.
Article by Nicki Toizer
Nicki is the Technical Director at The Mt. Airy Learning Tree in Philadelphia, Pennsylvania.
She is a fine art photographer, book designer for self-publishing authors, Star Wars fan, LEGO aficionado, and cat lover.
You can find her at Toizer.com